There’s a lot of work that goes into making a handmade wallet, as you might expect. Here, Parker Pierpont of Pierpont Leather walks us through the labor-intensive steps that go into crafting luxury leather goods. Enjoy the beautiful photos!

Part 1 of 7: Clicking
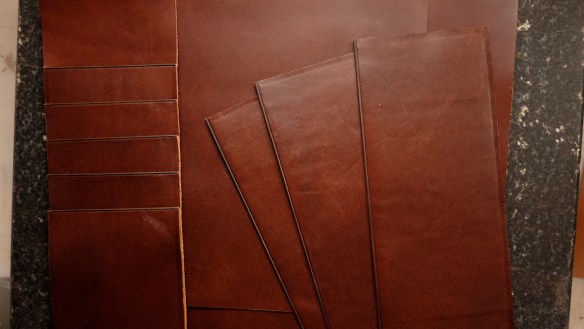
Usually, there are several hours that are dedicated to developing a pattern that meets the physical or aesthetic needs of a client. Sometimes, it can take days. A truly deep understanding of patterns and design emerges from hundreds of hours that are spent designing and realizing patterns for projects. It’s the direct relation of designing, patterning, and constructing a piece from beginning to end. This iterative process allows the maker to say “Oh, that’s a bit short,” or “I want this to feel softer” – and to then take a pattern out and write notes on it to implement for the next project or final iteration of the work at hand. Once the pattern (shown above) is settled upon, the leather is painstakingly ‘clicked’ – or cut – with hand tools.

Part 2 of 7: Lining and Trimming
Lining is extremely important to the integrity of a piece. It allows for a certain rigidity, and for a final product that feels lush and luxurious in the hand. After clicking and dimensioning, we arrange pieces together with their lining. Usually all of these pieces (in the case of the wallet shown, there are about 20 individual pieces of leather at this stage) have been refined to a very specific thickness already, within a tolerance of about .1mm. After all of the pieces are sorted and checked, the parts are carefully laminated, pressed, and allowed to cure for some time before being trimmed to final size. Below, you can see how the leather looks upon completion of this process.

Part 3 of 7: Finishing Pt.1
All edges that can’t be accessed later in the process are individually creased, sanded even, dyed, waxed, and polished multiple times. This seals any exposed edges and provides a finished look. This is especially time-consuming, but incredibly important, as it prevents unwanted moisture from entering what would otherwise be the very absorbent edges of the raw leather. Pictured below is the second to last stage of the edge finishing process, before the final polish.

Part 4 of 7: Assembly
Next, the internal pockets are assembled, sealed, and stitched down one by one. (This is the stage we’re at in the photo below). Afterwards, the entire card pocket assembly is lined and stitched closed on the side that will sit on the interior of the wallet.
Final assembly consists of lining the main pieces, stitching down any full-length pockets into place so as to limit their depth to a useful amount, and carefully lining them up to be perfectly symmetrical to one another in order to prepare for the next step.

Part 5 of 7: Stitching
After the wallet has been assembled completely, holes are marked along the exterior of the wallet to prepare for saddle stitching. All holes are placed with great consideration so as to make sure that any pieces that may be under stress are held down under a well-positioned stitch. The best part of this type of assembly is the amount of control that you feel you have with the final piece. It’s generally an extremely enjoyable process, though some find it slightly tedious.


Part 6 of 7: Finishing, pt. 2
Edge finishing is pretty straightforward – you make sure your edges are level, you seal and crease the perimeter, and then you polish with with dye and wax. In the first picture, you see a refined edge that is about halfway through the finishing process, and the final result in the photo below.


Part 7 of 7: The Reveal
This is the final piece – thanks for working along with us!
Want to know more about Pierpont Leather? You can view their affiliate thread (and ask Parker all the questions you want) here.
Suggested Reading
The following two tabs change content below.


Styleforum Editors
The Styleforum editors are a group of gnomes that actually do all of the work running Styleforum. Ari, and Jasper play air hockey, drink artisanal iced teas, and debate whether it's harder to get bolognese or bechamel out of grenadine ties, and whether either can be used to polish shoes.
Latest posts by Styleforum Editors (see all)
- Styleforum Sessions Podcast | A chat with Yuki Matsuda: director of Meg Company (Yuketen, Monitaly, Chamula, and Epperson Mountaineering) - August 24, 2022
- MEMORIAL DAY SALES 2020 MENSWEAR - May 23, 2020
- Classic Menswear Through the Lens - March 12, 2020
- Vintage: What the Expert Eye Looks For - February 14, 2020
- The Basics of Wedding Attire for Men: American and English Weddings - May 6, 2018


